A pour-over rig you actually use is one that lives on the counter, not in a cabinet. The trick to a station you'll keep using every morning is keeping the footprint small, the workflow obvious, and the cleanup minimal. Here's the five-piece setup we recommend — and the brewing recipe that produces a consistent cup in four minutes.
Why pour-over rewards the small investment
Compared to espresso, pour-over has a flatter learning curve and a lower equipment ceiling. A $200 pour-over setup will rival what cafés are pulling on $5,000 batch brewers. The reason: pour-over is mostly a function of three variables — water temperature, grind size, and pour technique — and all three are completely controllable at home for a tiny budget.
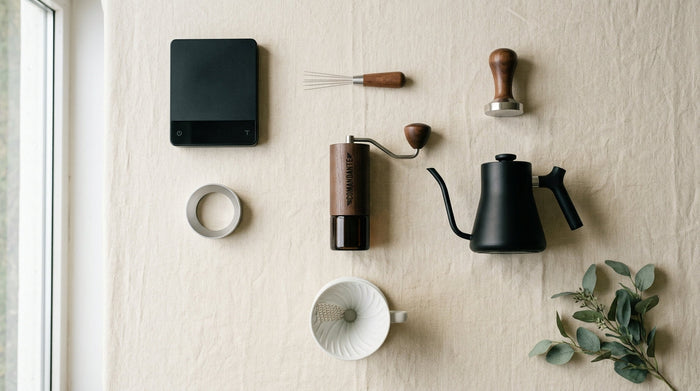
The 5-piece station
1. The dripper (the brewing chamber)
This is the cone-shaped vessel where extraction happens. The geometry matters: ribbed conical drippers (V60 style) produce bright, clean cups; flat-bottom drippers (Kalita Wave style) produce sweeter, more forgiving cups.
- For brightness and clarity: Hario V60 size 02 (ceramic or glass), $25–40
- For forgiving brews and beginners: Kalita Wave 185, $40–55
- Match filters to dripper: V60 takes V60 cone filters; Kalita takes wave filters. They're not interchangeable.
2. The dripper stand (the secret weapon)
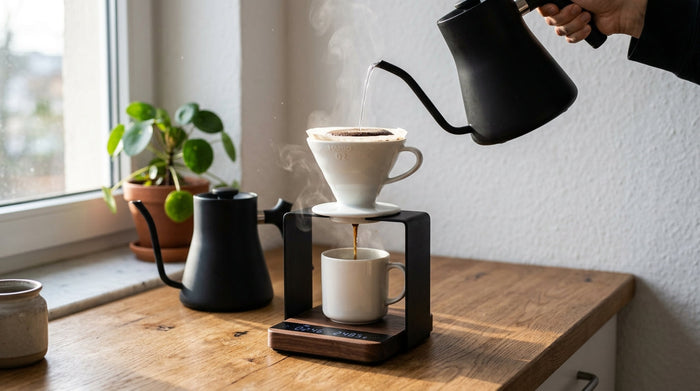
Most pour-over guides skip this, but a proper dripper stand changes the experience completely. Without one, you're balancing the dripper on top of a mug or carafe — every wobble risks a spill, and you can't see your weight on the scale below.
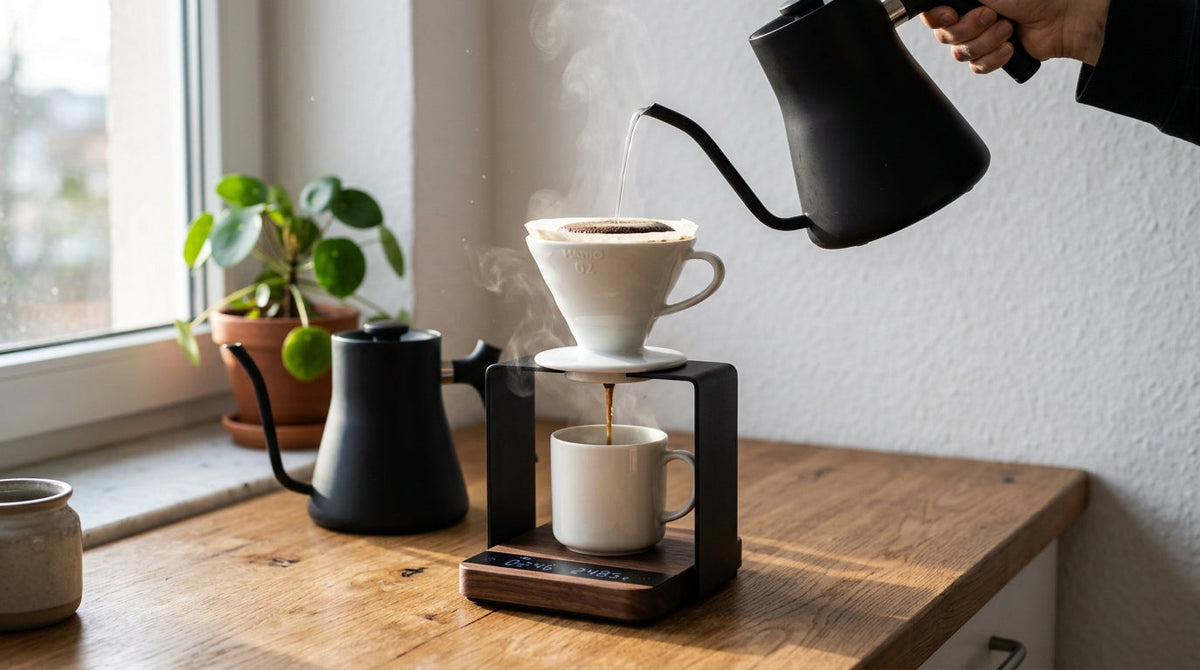
A stand holds the dripper at a fixed height, lets you swap the receiving vessel underneath, and keeps the scale visible. The result: a stable, hands-free pour with constant feedback on weight.
Our pick: Pour Over Coffee Dripper Stand. Aircraft-grade aluminum, universal fit for V60, Kalita, and most ceramic drippers, takes minimal counter space.
3. The gooseneck kettle
Pour-over requires precise water flow control. A regular kettle dumps water in a fat stream that disrupts the coffee bed and causes channeling. A gooseneck — with its long, narrow spout — gives you fine control over both placement and flow rate.
- Stovetop gooseneck (Hario, Fellow Stagg): $25–60. Need a separate thermometer or you'll guess at temp.
- Electric gooseneck with temp control (Fellow EKG, Brewista): $150–200. Set exact temp, hold it. Worth the upgrade if you're brewing daily.
- Travel kettle: compact gooseneck for travel/office. Our Travel Pour-Over Gift Set includes one sized for the included 300ml glass cup.
4. A precision scale with timer
Same scale that powers your espresso work. For pour-over, you need both weight (to control coffee:water ratio) and time (to manage the pour pace). A scale with built-in timer means you don't switch devices mid-brew.
Our pick: Precision Coffee Scale with Timer. 0.1g accuracy, 2000g capacity, fits under any dripper.
5. A burr grinder
Pour-over forgives lower-end grinders better than espresso, but you still need a burr grinder, not a blade. Blade grinders produce wildly uneven particle sizes — some dust, some boulders — and your brew will be both bitter and under-extracted at the same time.
For pour-over only, a manual ceramic burr grinder works great: quiet, no electricity, infinitely adjustable. Our Ceramic Burr Manual Grinder takes 60 seconds to grind 20g of beans for a single pour-over and lasts a decade with basic care.
The arrangement (your 18-inch zone)
Lay out the station in the order you'll use it, left to right (right-handed) or right to left (left-handed):
- Whole beans + grinder — at the start of the workflow.
- Filters + dripper — next to the grinder so you load the dripper after grinding.
- Stand + scale + carafe — the brewing zone.
- Kettle — closest to the brewing zone for the pour.
The total footprint: about 18 inches of counter (45cm). Smaller than a microwave. Keep this zone permanently set up — friction is the enemy of consistency, and you'll skip the brew if it takes 5 minutes to set up before the actual coffee.
The brew recipe (single 300ml cup)
Inputs
- Coffee: 18g, freshly ground
- Water: 300g, 92–94°C (197–201°F)
- Grind: medium — sea salt or kosher salt sized
- Ratio: 1:16.7 (standard third-wave starting point)
- Total time: 3:30–4:00
The 4-pour method (V60 or Kalita)
- 0:00 — Bloom (50g water). Wet all the grounds with about 50g of water. Wait 30 seconds. The coffee should puff up — that's CO2 escaping.
- 0:30 — First pour (to 150g total). Slow, concentric circles starting from the center, spiraling outward. Pour for ~30 seconds.
- 1:15 — Second pour (to 225g total). Same technique. Pour for ~20 seconds.
- 2:00 — Final pour (to 300g total). Same technique. Pour for ~20 seconds.
- By 3:30–4:00 — Drawdown complete. The bed should be flat with a slight dome. If it's deeply concave (a "deep crater"), your pour was too aggressive at the edges; aim more centrally next time.
The "flat bed" rule: after drawdown, lift the dripper and look at the spent grounds. A flat, even bed means even extraction. A side-leaning bed or a deep crater means uneven flow and channeling — adjust pour technique, not grind size.
Troubleshooting common cups
The brew tastes sour and weak
Under-extracted. Either grind finer (most likely fix), pour slower, or increase water temperature by 2°C.
The brew tastes bitter and astringent
Over-extracted. Grind coarser, pour faster, or drop water temperature by 2–3°C.
The drawdown takes 6+ minutes
Grind too fine, or pour was too aggressive and compacted the bed. Grind coarser.
The drawdown finishes in 2 minutes
Grind too coarse, or your filter has a defect (rare). Grind finer.
One side of the bed is taller than the other
Pour technique. You're pouring more on one side. Practice slow, even concentric circles — your wrist will get smoother in 1–2 weeks.
Cleaning (60 seconds total)
- After the brew: lift the dripper with the spent filter, fold the filter over the grounds, drop into compost.
- Rinse the dripper under hot tap water for 10 seconds. Done.
- Wipe the stand if any drips landed. Aluminum cleans with a damp cloth.
- Empty the kettle if you brewed multiple cups. Don't leave standing water — it'll mineral-scale the spout.
- Once a week: deep clean the dripper with a paste of baking soda + water (removes oil residue that builds up over time).
The travel option
If you brew at home but also travel for work or weekends, a dedicated travel kit is worth the small extra investment. Our Travel Pour-Over Gift Set packs a 300ml glass cup, a mini gooseneck kettle, and a compact storage bag — fits in any backpack or carry-on, and means you're not stuck with hotel coffee.
Same brewing recipe, same workflow, just at the airbnb instead of your kitchen.
Total budget
| Item | Budget tier | Quality tier |
|---|---|---|
| Dripper | $25 | $40 |
| Dripper stand | $35 | $35 |
| Gooseneck kettle | $40 | $165 |
| Scale + timer | $30 | $50 |
| Burr grinder (manual) | $45 | $45 |
| Total | $175 | $335 |
Compare that to spending $5/day at a café — you've broken even in 5 weeks at the budget tier and 9 weeks at the quality tier. After that, every cup is profit.
Start here
If you're building a station from scratch, prioritize: dripper + filters first (you have to brew something), then a scale, then upgrade your grinder. The kettle and stand can come last — both work with cheaper substitutes initially. By the time you've assembled all five pieces, you'll have a daily ritual that beats most cafés in your neighborhood, takes less time than a Starbucks line, and costs about $0.40 per cup once you're set up.